


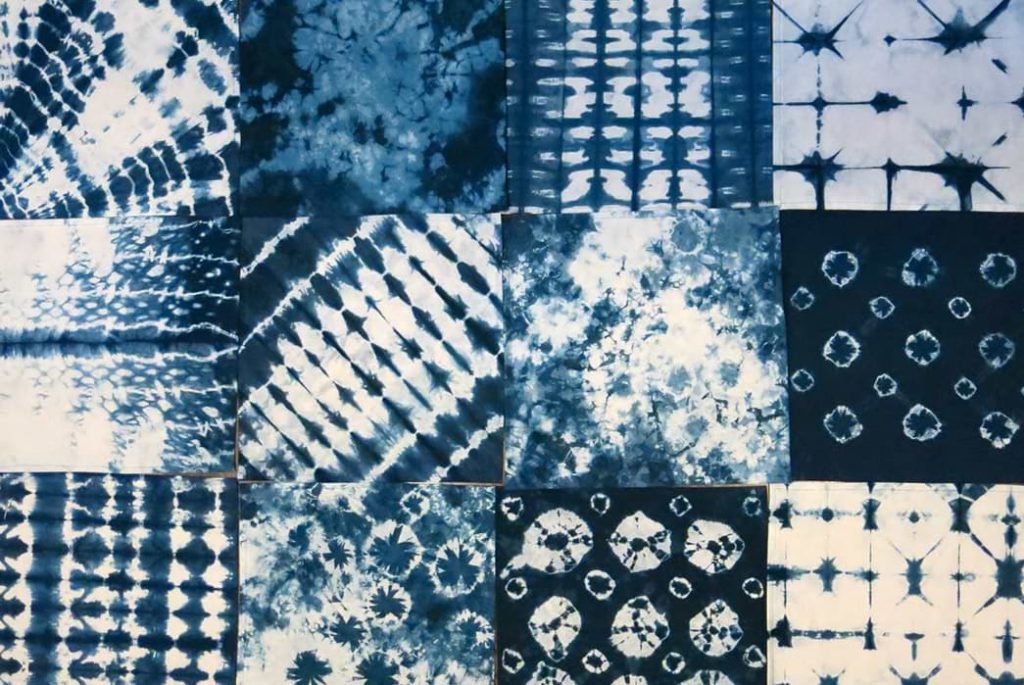
Tie dye shirts have been going in and out of trend for centuries. While we attribute tie dye patterns to the hippie era of the sixties, the practice of tie dye actually dates back to the late Stone Age period. Tie die isn’t just the iconic spiral rainbow of colors from the center of a shirt going outwards; if you look at Asian and African tie dyes throughout history, you can find the beauty in symmetrical art as well as the different ways cultures have blended the art of resist dyeing and color to create a unique tie dye look.
To get your own tie-dye shirt, you could always go to your local department store and find one. While we’re way past the ‘60s, tie dye has constantly been going in and out of trends, so you’re probably going to find one or two racks selling a type of tie dye shirts. The problem when you buy tie dyes at a department store, however, is that the company that made that shirt you’re buying likely made a hundred other shirts with the exact same tie dye design. This cancels out the whole reason why hippies of the ‘60s claimed the iconic tie dye shirts, which was that no two tie dye shirts are alike, emphasizing the individuality and uniqueness of each person at the time.
If you’re interested in getting a tie dye shirt that matches your style and is the only one of its kind, then as long as you have an old white shirt in your closet, you can make one in your own home. Because of the various ways cultures have learned to create their own tie dye designs, here are five different ways to make a tie dye shirt.
What Is Resist Dyeing?

Before we begin, you first need to understand how tie dye works so that the steps will make sense. Tie dye has a different term in other cultures, but what brings them all together is the concept of “resist dyeing” is. Resist dyeing is preventing certain parts of cloth from being stained by the dye.
In Ancient Japan, for example, they would use wax, starch, mud, rice paste, or any clamp, while in Indonesia and Malaysia, they would tightly wrap yarn over certain sections of the fabric to prevent dyes from bleeding out onto other sections.
In all five ways mentioned in this article, we will use rubber bands to serve as our block for the resist dyeing. You might already have a bunch of rubber bands at home, and if you have enough, then this should be fine. But if you need to buy more rubber bands, you can buy them from your local hardware or office supply store.
Materials

You will need the following:
- 1 old white shirt
- Rubber bands
- Tie Dyes
- Paint brush (for ombre effect)
- Plastic wrap or plastic bags
- Disposable latex or plastic gloves
- Apron
I recommend wearing gloves and an apron during this procedure as there may be some staining on your skin (depending on the dye brand) and your clothes. If you don’t have an apron, wear an old shirt and some shorts you don’t mind staining in case they come into contact with the dye.
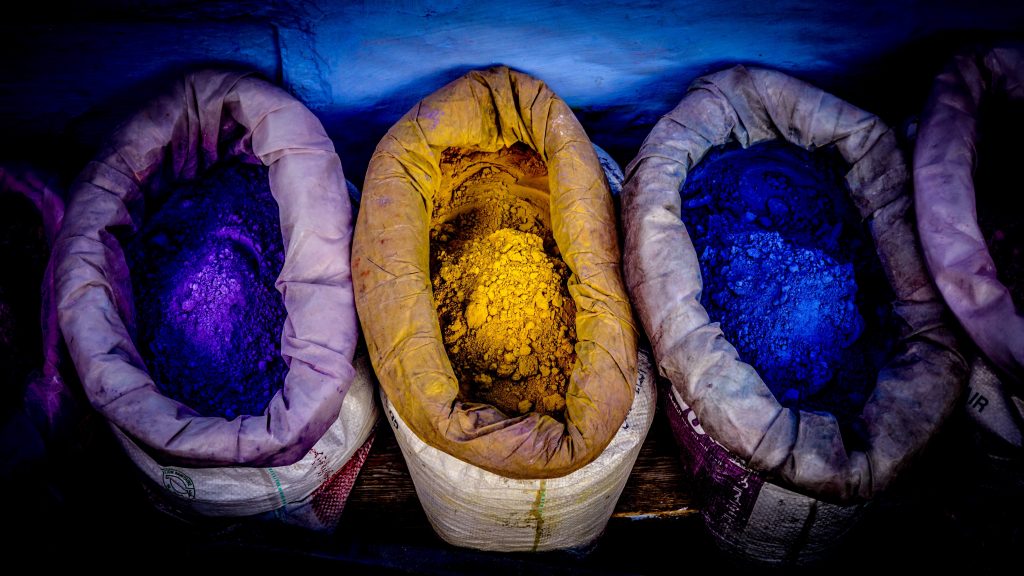
For the tie dye colors, you can choose whatever colors you want to design your shirt with. To be safe and get the widest range, at least get yellow, red, and blue dyes. These are primary colors and you could also make orange, green, and purple by combining two colors together.
When it comes to tie dye, Rit dye is the most popular and comes in many colors and shades. They even provide brighteners so that your old white shirt can be whitened before the start of the tie dye, which can make the colors of the dye pop out even more. Rit is available in Target’s craft aisle, or you can check your local craft store. If Rit is unavailable in your store or country, any dye brand is fine.
Regardless of the method you choose, prewash your shirt to get rid of the sizing, but don’t use fabric softener or conditioner or dryer sheets. Sizing is the substance used by clothing manufacturers on their shirts. If it’s a new white shirt, it has traces of sizing, but if it’s an old shirt, it’s likely been washed away. However, if you want the colors to blend together, make sure your old white shirt is damp. If you don’t want it to blend, keep it dry during the procedure.
Tie Dye Methods and Instructions
Method 1: The Symmetrical Pleats
- Fold your shirt from left to right in an accordion method. The result should look like a long vertical piece of cloth with multiple pleats.
- Tip: You don’t have to do it strictly vertically from left to right. Go any direction and start at any point, but make sure the pleat size stay uniform to keep the symmetry of the pleats.
- Wrap rubber bands around the shirt at least every three inches to create sections. Make sure the rubber bands are tight to keep the resist dye.
- Add dye over the sections according to your preference.
- Place your shirt inside your plastic wrap or plastic bag. Leave the ink to soak for at least six to eight hours (depending on what your dye brand recommends). Afterwards, untie the rubber bands and stretch out your shirt to see the finished product.
Method 1.5: The Stripes
For symmetrical stripes with the iconic tie dye style, follow steps 1 and 2. When coloring, use only two alternating colors.
Method 2: The Swirl
- Pinch the center of the shirt and start twisting in one direction. Keep swirling while keeping the shirt flat until your shirt is in a round spiral ball.
- Use your rubber bands to hold its shape. Don’t be afraid if it doesn’t look like a clean and perfect swirl. As long as there is a visible spiral in the center and you get to dye it, it should be fine. The rubber bands should create sections similar to pizza slices on the circle.
- Tip: Use less rubber bands if you want to have less sections. For example, if you only want to have two colors on your spiral, use two rubber bands. This will give you four sections you can dye in an alternating pattern.
- Color each section according to your preference. Flip the circle over and dye the rest of the shirt.
- Keep your shirt inside your plastic wrap or plastic bag for six to eight hours to soak. Untie the rubber bands and stretch out your shirt to see the finished product.
Method 3: The Bullseye
- Lay your shirt flat. Locate which part of the shirt where you want the center of the bullseye will be. This is usually the center of the shirt, but if you want it to be elsewhere, this is fine. Pinch that part of the fabric and pull it upwards. This is your bullseye point. Around an inch or two from the bullseye point, tightly wrap a rubber band around the shirt. It should be in a tube-like shape.
- Tip: Use a coin to help you shape where the bullseye will be. Locate the bullseye point and then place the coin under the shirt. Pull the shirt and the coin up and then tie a rubber band directly under the coin. This gives your bullseye a perfect circle bullseye.
- Continue to tie rubber bands every two or three inches along the fabric. This doesn’t have to be exact measurements, but make sure the rubber bands are tight. If you’re feeling colorful and have many colors to spare, you can shorten the gap between sections by around one to two inches. When you’re done, it should look be tubed-shaped with several sections separated by tightly-wrapped rubber bands.
- Once that’s done, you should have around four to six sections. Add one color to each section.
- Tip: You don’t have to use different colors for all sections. You can create a simple two-colored pattern or repeat colors randomly. You can even use only one color; the tie dye will show a bullseye using the dye color of your choice and the white of your shirt that resisted the dye under the rubber band. How you dye it is up to you.
- Leave it in a plastic bag or plastic wrap to let the dye soak for up to eight hours. Take it out, remove the rubber bands, and wash.
Method 3.5: Multiple Bullseyes
When making bullseyes, you don’t have to limit yourself to one bullseye. Simply perform step 1 in separate areas. For example, you can make one bullseye on the sleeve and then a second one around the stomach area of the shirt. When performing step 2, the result isn’t a straight tube, but rather a long tube (either ends are where the two bullseyes begin), and a small tube sticking out.
Final Tips
Before wearing your shirt, wash your shirt in warm to hot water (the hottest water suitable for fabrics). Wash it with a non-bleaching detergent and let it dry.
While the color will last a long time, the color will eventually fade from natural wear and tear and it won’t look as vibrant as before. It should last you a few months up to a year, depending on the dye brand, how long you’ve let the dye soak, and how often you wash and wear the shirt.
When your old white shirt’s lost its brightness or if you’re interested in adding more color to your style, instead of buying a new shirt, consider doing your own tie dye. Not only is it cost effective and you can use your dye to decorate other fabric-based items at home, but you also create a one-of-a-kind shirt that no one else has.

